If you want to develop with Wagtail and PostgreSQL in a platform-independent way, using Docker is a good choice. In the following tutorial, I would like to share my approach.
To create an empty and up-to-date Wagtail project as a Docker environment with PostgreSQL, I use docker-compose.
Important: To follow this tutorial it is necessary to have a working Docker environment including docker-compose installed on the development machine.
Create a fresh wagtail project
Before we get into Docker, let's first create a local Wagtail project in a few steps with Python virtual environments.
% python3 -m venv venv
% source venv/bin/activate
% pip install --upgrade pip
% pip install wagtail
% wagtail start app
Now we have clean base install. We don't need the Python virtual environments from now on and can delete the directory "venv" completely. Now it's time to take care of Docker.
Dockerize Wagtail
In the first step, we define the environment variables for the two Docker instances, respectively for the wagtail Docker and for the database Docker. For this we create the two files .env.dev and .env.dev.db in the root directory of the project.
# .env.dev

DEBUG=True
SECRET_KEY=[Your SECRET_KEY]
DJANGO_ALLOWED_HOSTS=localhost 127.0.0.1 [::1]

SQL_ENGINE=django.db.backends.postgresql_psycopg2
SQL_DATABASE=demo_wagtail
SQL_USER=demouser
SQL_PASSWORD=DemoPass
SQL_HOST=db
SQL_PORT=5432
DATABASE=postgres
# .env.dev.db
POSTGRES_USER=demouser
POSTGRES_PASSWORD=DemoPass
POSTGRES_DB=demo_wagtailSince we are using PostgreSQL, we need a PostgreSQL database adapter for Python and have to add "psycopg2-binary==2.8.6" in the requirements.txt.
We need to adjust the Wagtail settings files according to the environment variables. For this we delete the default database information from the settings/base.py and adapt the settings/dev.py as follows:
from .base import *

SECRET_KEY = os.environ.get("SECRET_KEY")
DEBUG = os.environ.get("DEBUG")
ALLOWED_HOSTS = os.environ.get("DJANGO_ALLOWED_HOSTS").split(" ")

# Database PostgreSQL
DATABASES = {
    'default': {
        'ENGINE': os.environ.get("SQL_ENGINE"),
        'NAME': os.environ.get("SQL_DATABASE"),
        'USER': os.environ.get("SQL_USER"),
        'PASSWORD': os.environ.get("SQL_PASSWORD"),
        'HOST': os.environ.get("SQL_HOST"),
        'PORT': os.environ.get("SQL_PORT"),
    }
}

EMAIL_BACKEND = 'django.core.mail.backends.console.EmailBackend'

try:
    from .local import *
except ImportError:
    pass
For the Wagtail container, we need an entrypoint shell script that checks if the database has been started successfully and then performs the database migrations (/app/entrypoint.sh).
#!/bin/sh

if [ "$DATABASE" = "postgres" ]
then
    echo "Waiting for postgres..."

    while ! nc -z $SQL_HOST $SQL_PORT; do
      sleep 0.1
    done

    echo "PostgreSQL started"
fi

python manage.py makemigrations --settings=app.settings.dev
python manage.py migrate --settings=app.settings.dev

exec "$@"
Now, we edit the /app/Dockerfile as follows:
# /app/Dockerfile
# Pull the base image
FROM python:3.8.5-alpine3.12

# Set workdirectory
WORKDIR /usr/src/app

# Enviroment variables
ENV PYTHONDONTWRITEBYTECODE 1
ENV PYTHONUNBUFFERED 1

# Install server packages
RUN apk update \
    && apk add postgresql-dev gcc python3-dev musl-dev libffi-dev openssl-dev \
    && apk add jpeg-dev libwebp-dev zlib-dev freetype-dev lcms2-dev openjpeg-dev tiff-dev tk-dev tcl-dev libxml2-dev libxslt-dev libxml2


# Install python packages
RUN pip install --upgrade pip
COPY ./requirements.txt /usr/src/app/requirements.txt
RUN pip install -r requirements.txt

# Postgres Entrypoint
COPY entrypoint.sh /usr/src/app/entrypoint.sh
ENTRYPOINT ["/usr/src/app/entrypoint.sh"]
The last file we need to create in the root directory is docker-compose.yml.
version: '3.7'

services:
  web:
    build: app
    command: python manage.py runserver 0.0.0.0:8000 --settings=app.settings.dev
    volumes:
      - ./app/:/usr/src/app/
    ports:
      - 8000:8000
    env_file:
      - .env.dev

    depends_on:
      - db
  db:
    image: postgres:12.2-alpine
    restart: always
    ports:
      - "5432:5432"
    volumes:
      - postgres_data:/var/lib/postgresql/data/
    env_file:
      - .env.dev.db

volumes:
    postgres_data:
Our Wagtail project should now have the following structure:
├── app
│   ├── app
│   ├── home
│   ├── search
│   ├── Dockerfile
│   ├── entrypoint.sh
│   ├── manage.py
│   └── requirements.txt
├── .env.dev
├── .env.dev.db
└── docker-compose.yml
Now it's time to build and start the containers with docker-compose.
% docker-compose up -d --buildIf everything went smoothly, we should have two running containers and an already working Wagtail website that is accessible under http://localhost:8000. We only need to set the administrator account. We can do this very easily with "docker-compose exec".
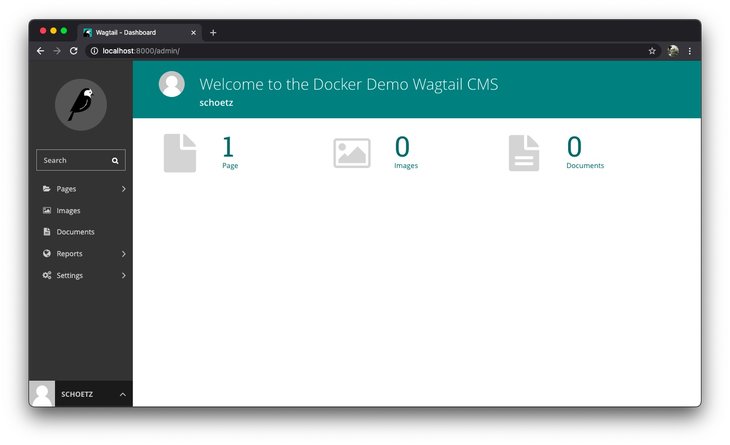
% docker-compose exec web python manage.py createsuperuser --settings=app.settings.devOpen http://localhost:8000/admin/ with your browser and log in with your new administrator credentials.
We now have a wonderful working environment with which we can further develop our Wagtail website. In another tutorial, I will show how to deploy the final website as a Docker project using Gunicorn and NGINX on a production environment.
You can find the whole project ready to use on my GitHub repository:
phookycom / wagtailondocker
Cover image by Phooky.COM | Vector graphics by Macrovector | shutterstock 1741557098 & 1020152335

